
The screenshots in this guide use the light theme, which is the default. If your app is showing dark mode, click the sun icon at the top right to switch back to light.
Email campaigns let you send a one-time message to a targeted group of patrons — ticket buyers, donors, a saved audience, or any combination of rules you define. You write the email in the campaign composer, preview it against sample patron data, and send it immediately or schedule it for later.
The campaigns list
Go to Admin → Venues → [your venue] → Campaigns to see all campaigns for the venue.
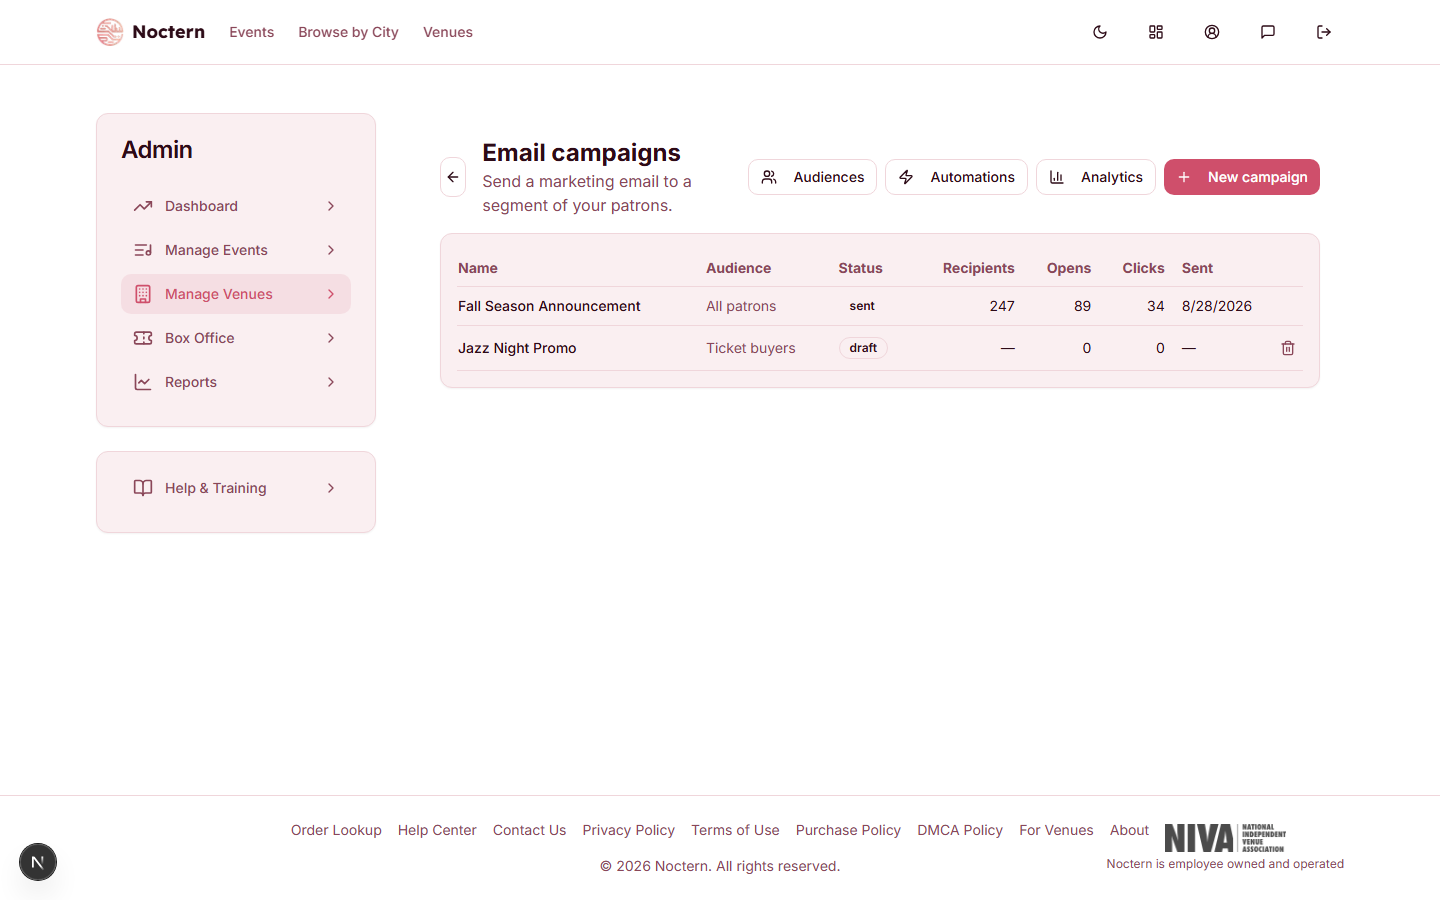
Each row shows:
- Name — your internal label for the campaign
- Audience — a short label describing who was targeted (for example, "All patrons" or "Custom rules")
- Status — Draft, Scheduled, Sent, or Failed
- Recipients — how many patrons received it
- Opens and Clicks — email engagement counts (updated by Resend webhooks; may lag a few minutes)
Only draft campaigns can be deleted.
Creating a campaign
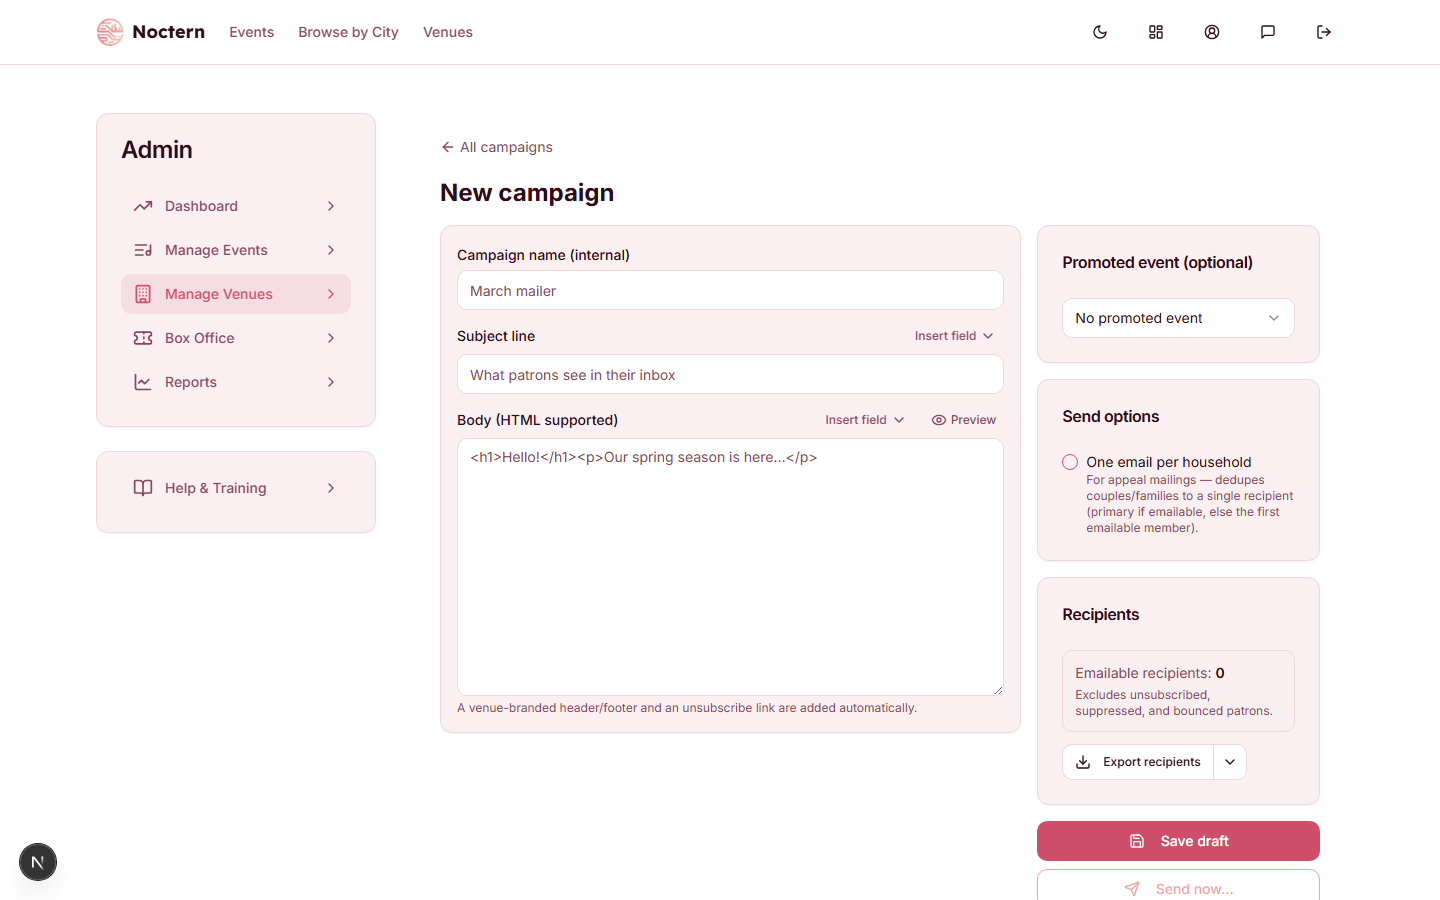
Go to Admin → Venues → [your venue] → Campaigns and click New campaign.
Enter a Campaign name (internal label) and the email Subject line.
Write the email body. You can use merge fields — tokens like
{{firstName}}that are replaced with each patron's data when the email sends. Click Insert merge field to pick from the available tokens. See Merge fields below.Choose your audience. Select Simple for a single preset scope, Advanced to build compound rules, or Saved audience to pick a previously saved audience definition.
Optionally pick a Promoted event — when selected, the "Exclude buyers of this event" checkbox appears and is checked by default. This prevents sending a promotional email to people who already bought tickets to that event.
Click Preview to see how the email looks with sample patron data filled in.
Click Send now to send immediately, or set a future date and click Schedule.
Once a campaign is sent, it is locked — you cannot edit the content or audience.
Merge fields
Merge fields let you personalize the subject line and body with patron-specific values. Type the token directly or use the Insert merge field dropdown in the composer toolbar.
| Token | What it inserts |
|---|---|
| {{firstName}} | Patron's first name |
| {{lastName}} | Patron's last name |
| {{fullName}} | First and last name combined |
| {{informalSalutation}} | Household informal salutation (e.g. "Dear Jane") |
| {{formalSalutation}} | Household formal salutation (e.g. "Dear Ms. Smith") |
| {{email}} | Patron's email address |
| {{venueName}} | Your venue name |
| {{lastEventTitle}} | Title of the patron's most recent ticket purchase |
| {{lastEventDate}} | Date of the patron's most recent ticket purchase |
You can chain a fallback after a pipe: {{firstName|Friend}} inserts "Friend" when the patron has no first name on file. Nest fallbacks for robustness: {{informalSalutation|{{firstName|Friend}}}}.
Merge fields that have no value for a patron are left blank — this can produce awkward sentences like "Hi ," if you write "Hi {{firstName}}," without a fallback. Always add a fallback for name fields.
Marketing consent
All campaigns automatically exclude patrons who have opted out of marketing email, have a bounced address, or have marked a previous message as spam. You do not need to filter these out manually.
Create a draft campaign with subject "Hello {{firstName|there}}" and body "Thanks for supporting {{venueName}}." Preview it to confirm the merge fields resolve correctly, then delete the draft.