
An automation sends an email on its own whenever a trigger is met, so you do not have to build a campaign each time. Use one for a reminder before each show, a follow-up after it, a welcome a few days after a purchase, or a win-back for patrons who have gone quiet. Automations are for venue admins; box-office staff cannot open these pages.
Where to find it
Go to Admin → Venues → [your venue], click Marketing in the Money group, then click Manage automations in the Automations section. The Automations button at the top of the Email campaigns page opens the same list.
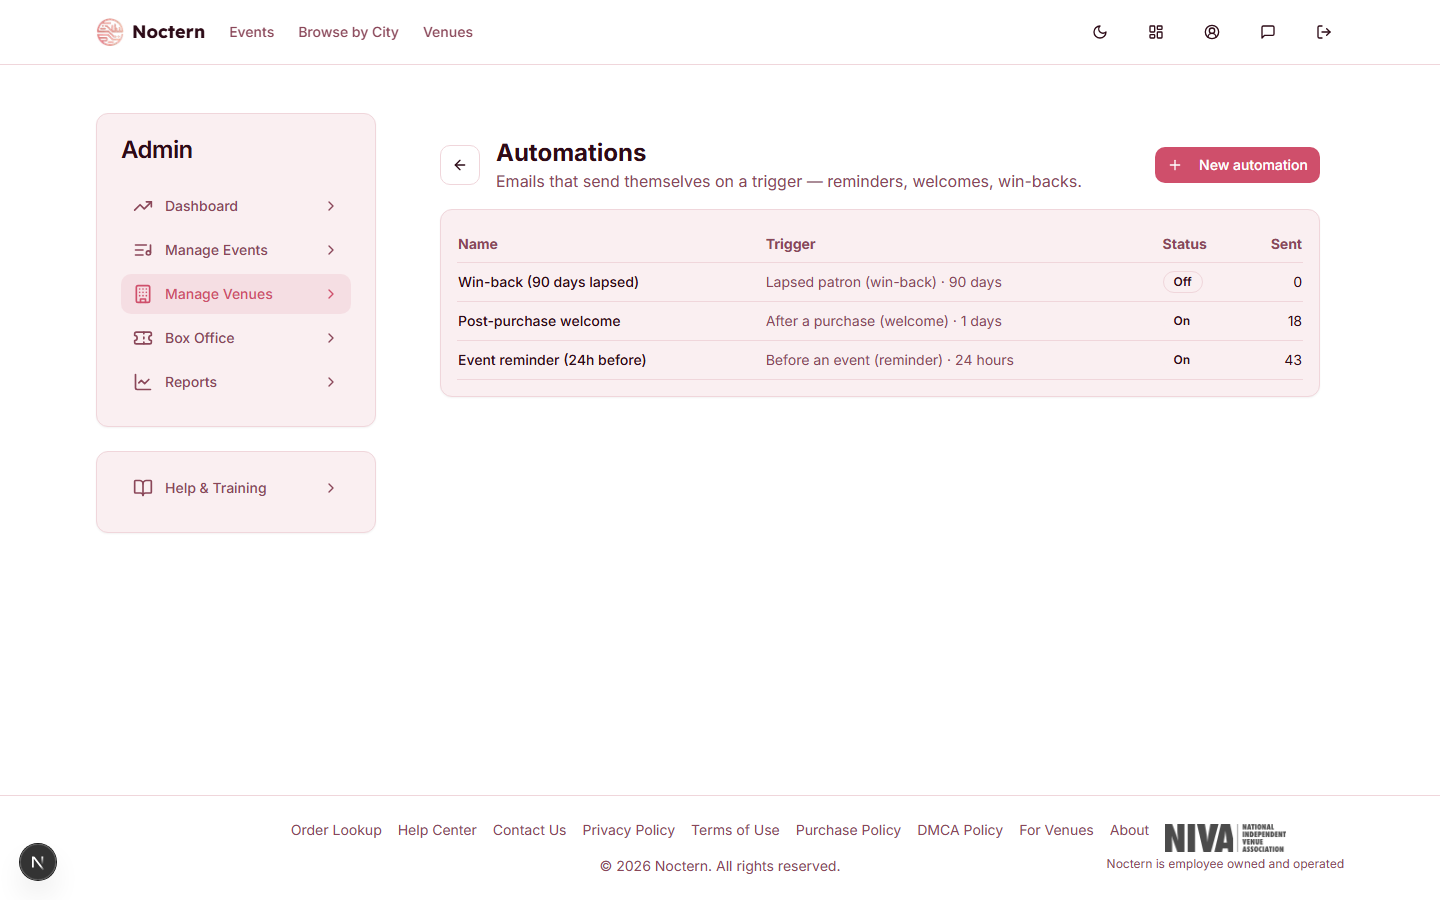
The list shows each automation's Name, Trigger (with its timing), Status (On or Off) and Sent — the number of emails it has sent so far.
The four triggers
| Trigger | Who gets the email | Timing you set |
|---|---|---|
| Before an event (reminder) | Everyone with a completed order for the show | hours before start — the email goes out once the show is that close |
| After an event (follow-up) | Everyone with a completed order for the show | hours after it ends |
| After a purchase (welcome) | The patron who bought | days after buying |
| Lapsed patron (win-back) | Patrons whose last order is older than your number of days | days since last order |
How often each patron hears from an automation:
- Reminder and follow-up — once per show. Someone with tickets to three shows gets three reminders.
- Welcome — once ever, after their first purchase that the automation sees. Later purchases do not send it again.
- Win-back — once each time a patron lapses. If they order again and later go quiet again, they get it again.
Automations are checked every 30 minutes, so an email goes out within about half an hour of the moment it becomes due — not to the minute. A patron who buys a ticket after the reminder has already gone out to everyone else still gets it at the next check.
Setting up an automation
On the Automations page, click New automation.
Enter a Name (internal) and the email Subject. Both are required.
Write the email in Body (HTML supported). Your venue's name, address and an unsubscribe link are added at the bottom automatically.
Choose a Trigger and enter the number under Timing — for example 24 hours before start, or 3 days after buying.
Optionally choose a saved audience under Limit to audience (optional). Only patrons who are in that audience receive the automation; everyone else is skipped even when the trigger is met. Leave it on All triggered recipients to send to everyone the trigger finds.
Leave Enabled (send automatically) unticked and click Create automation. Read the email through once more, then tick Enabled (send automatically) and click Save when you are ready for it to start.
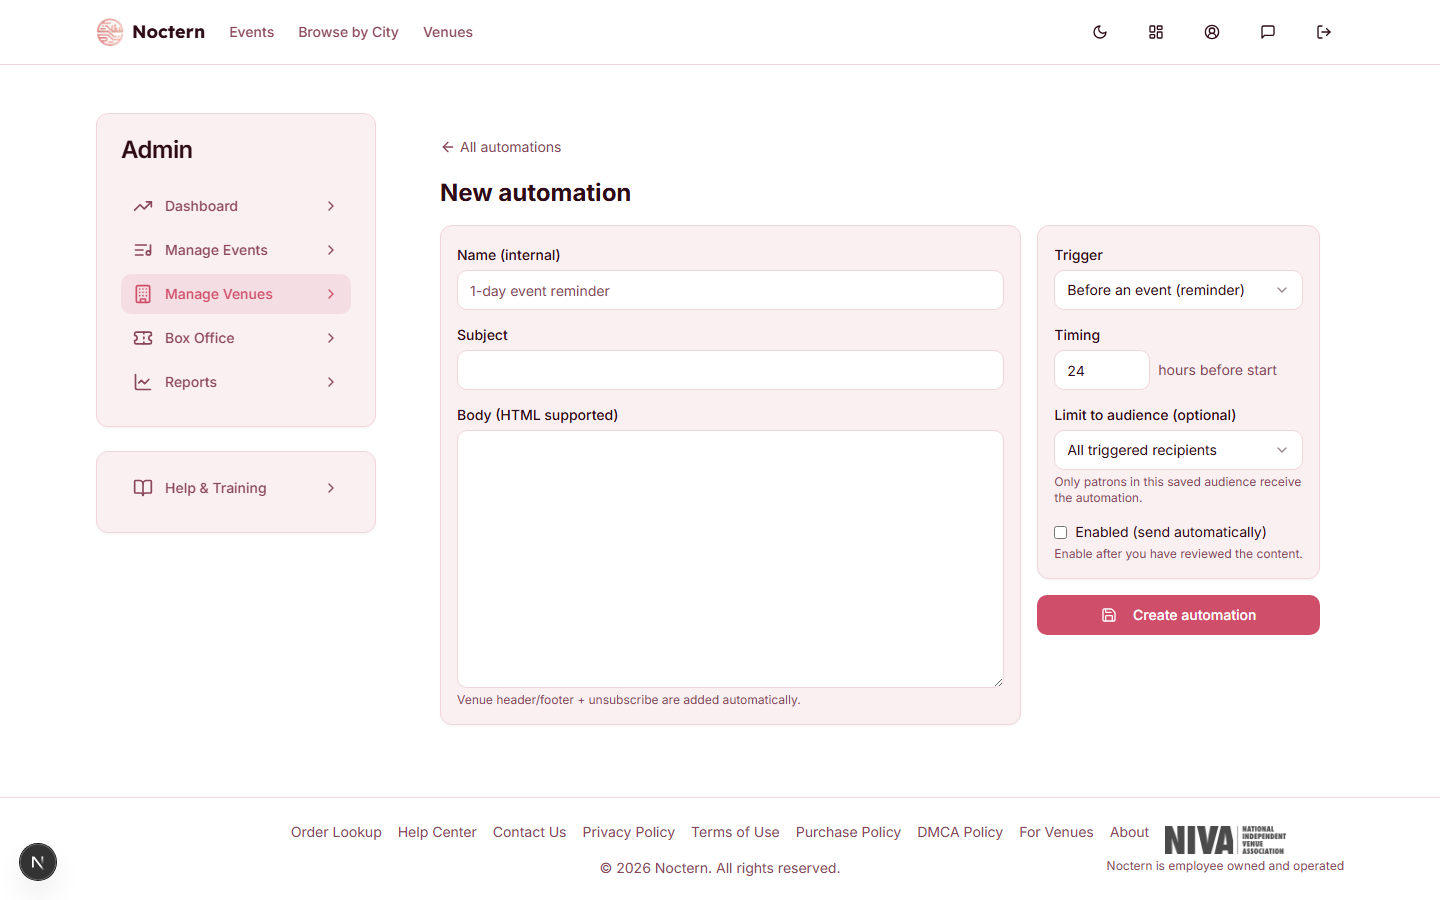
A new automation starts switched off, so nothing sends until you have reviewed it.
Merge fields
The subject and body accept the same merge fields as a campaign — for example {{firstName|there}} or {{venueName}}. The automation editor has no Insert field menu, so type the token yourself. The full list is in the "Merge fields" section of Email campaigns.
Think about who is already due before you tick Enabled. The moment a win-back automation is switched on, every patron whose last order is already older than your number of days is due. A follow-up switched on today is due for every show that ended in the last 30 days. Use Limit to audience to narrow the first run, or wait until just before a show to switch on a follow-up.
Checking results
Click an automation's name to open it. Above the editor are its totals: Sent, Delivered, Opens, Clicks and Bounced. Opens and clicks are reported back by the email service and can lag a few minutes. There is no per-patron list of who received an automation.
The Marketing page also shows how many automations are active, sends in the last 30 days, lifetime sends and the open rate across all of them — see The Marketing hub.
Switching off and deleting
- Untick Enabled (send automatically) and click Save to pause an automation. Its status changes to Off and it keeps its content and totals. Emails already sent are not affected.
- Click Delete at the top of the automation to remove it. It stops sending; emails already sent are unaffected.
- A large batch is sent over several checks — up to 400 patrons per automation every 30 minutes — so a big win-back can take a few hours to finish. Switching it off stops the rest.
- If the saved audience an automation is limited to no longer exists, the automation sends to nobody rather than to everyone.
Who is never emailed
An automation skips patrons who have unsubscribed or are marked do-not-email, patrons whose address bounced or who reported an email as spam, and patrons with no email address — including for reminders and follow-ups, because every automation is treated as marketing email.
Create an automation named "Post-purchase welcome" with trigger After a purchase (welcome) and timing 1 day. Use the subject "Thanks for your tickets, {{firstName|there}}!" and a short body. Click Create automation, check it in the list with status Off, then open it, tick Enabled (send automatically) and click Save.